In this article https://infotechabout.com/code-editors-in-salesforce We have discussed two code editors, the first one is the developer console, which we are using frequently and this mostly using by all salesforce developer. The other one that we have discussed Salesforce setup, where we can create an Apex class directly from the setup, and we also get a nice panel here to edit a particular class. For example, let me open this account controller and we can edit this class right here within the Salesforce setup itself.
Now the waiting time is over, and we are going to explain another code editor that we are using very heavily for our projects and for professional development in salesforce; that’s called VS Code, and unlike Salesforce setup or developer console, the VS code doesn’t come in built in a Salesforce Org, you have to download it from https://code.visualstudio.com/download in your local machine, and from there, you can start your development and push your changes to your Salesforce Org.
It’s very easy to set up VS code, and I’m going to explain all the steps that we need to perform to download VS code successfully and install it and then make it work with your Sales force Org.
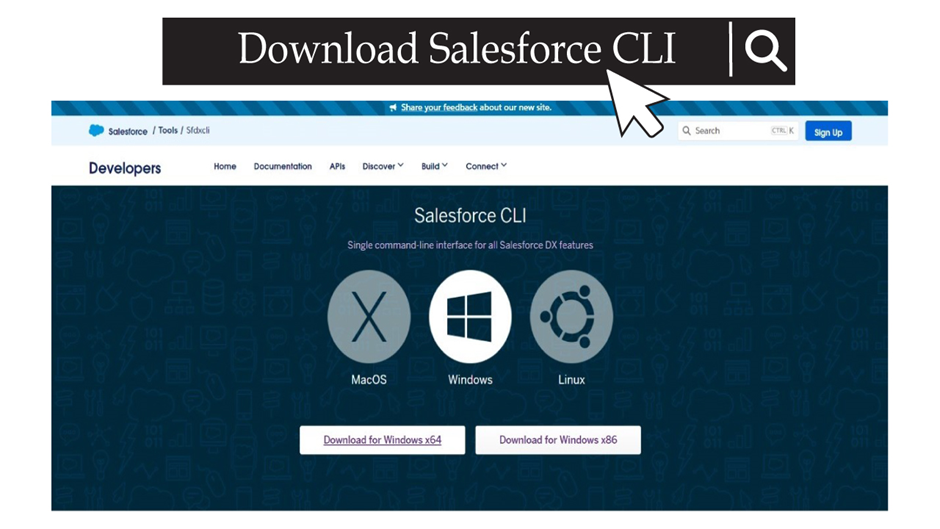
First of all, we need to download the Salesforce CLI, which is a command line tool available for Salesforce development or to manage Salesforce development. For that, just type in Download Salesforce CLI in Google Search Engine, and you will see this page called Salesforce CLI, and it comes from Salesforce developers. Just click on this page and you’ll be taken to a link where you can download the Salesforce CLI for your respective OS.
I’m using a Windows 64bit Machine, so I’m going to download the Windows 64bit version of Salesforce CLI, but you can download it for Mac and Ubuntu as well.
So, click on this download for Mac OS and the download will begin.
So, once the Salesforce CLI is downloaded, you need to install it, just double click on the downloaded file and then you can go through the complete installation process. So, this would be the first step to set up VS code in your local machine. So, once you install Salesforce CLI, now let’s come back to our Google Search Engine and here we need to search for Download VS code, and here you can go to the official website of VS code, and from there you can download it for your respective operating system.
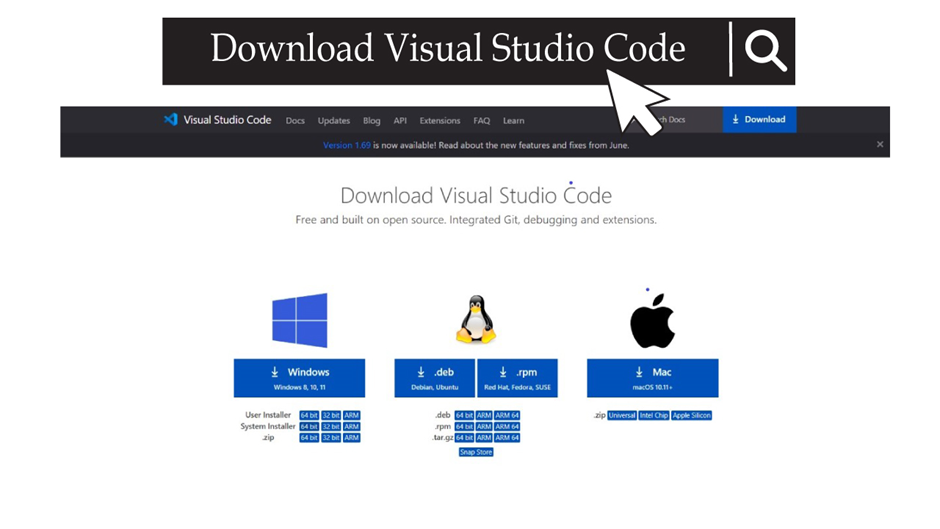
Again, I’m going to download it for Windows, but you can download it for Mac and Linux as well, or there are other options available as well, like Ubuntu, Red Hat and Fedora. So, just download it for your operating system and then go through the installation process.
Once VS code Downloaded and Installed, you can open VS code and you would see a screen like this:
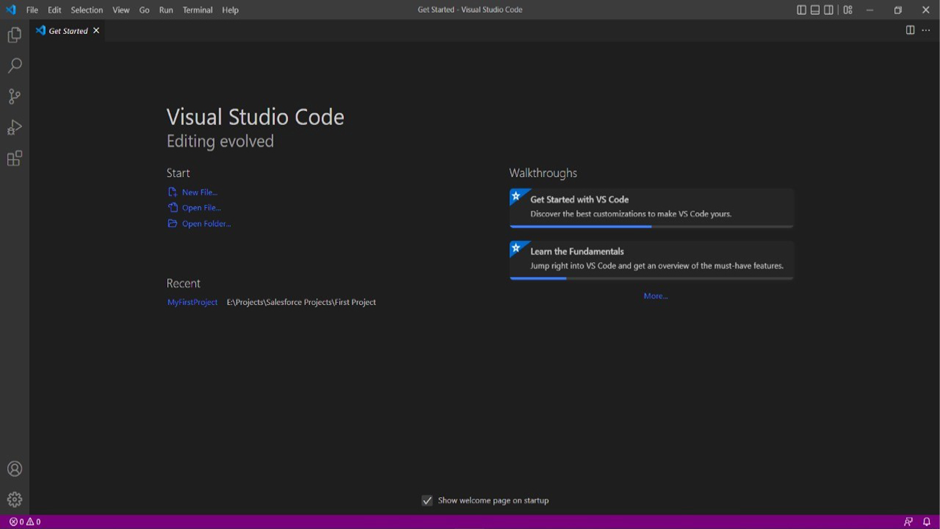
That is a welcome screen, and this is the window, or this is the code editor where you will start your development work. Before we start our development here, we need to download a few extensions from VS code extension market, and these extensions can help us develop our application faster because they provide certain features like autocomplete, or they make it easy to deploy your code in your Salesforce Org.
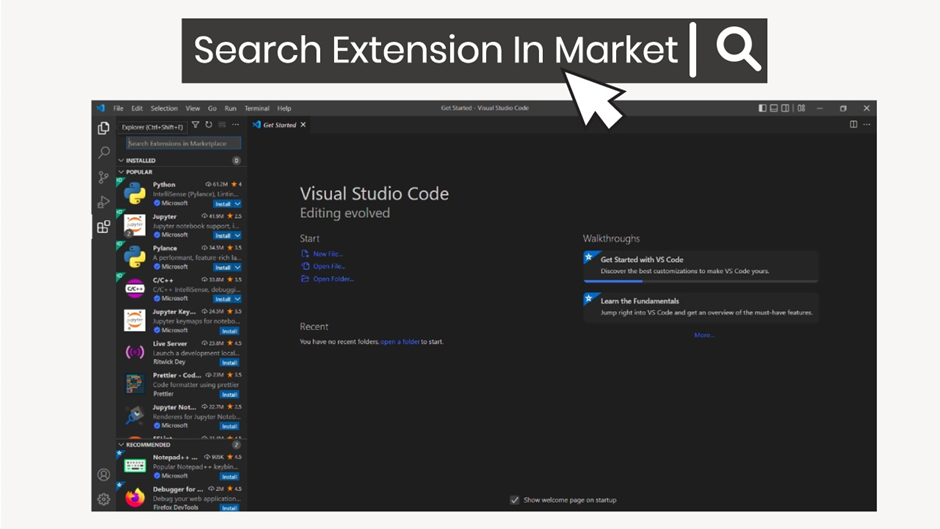
So here, just click on this extension icon, which is the last on this left-hand side panel, and here, search for Salesforce extension pack, click on this extension pack and you will see an install button here, this blue button here and you can install this Salesforce extension pack.
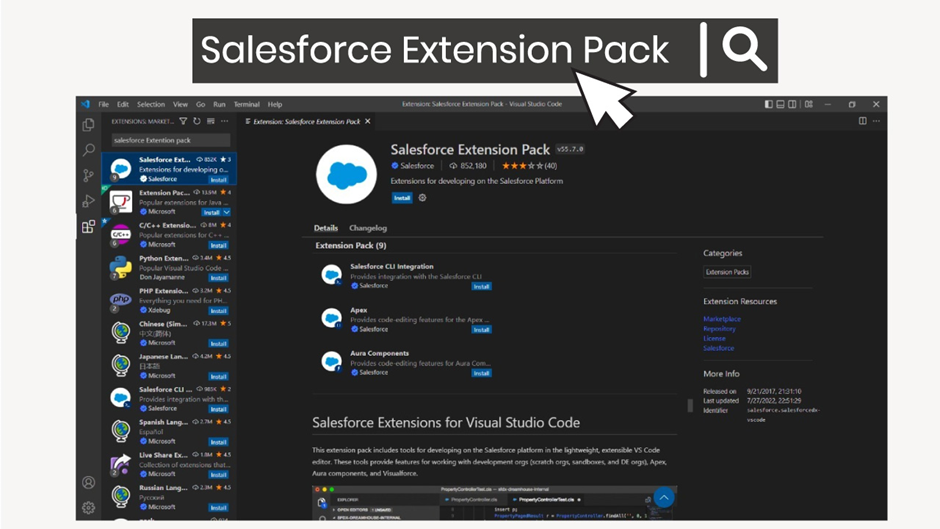
Now, this is an extension pack, which has almost seven extensions and these all are provided by Salesforce. So, just install this extension pack and restart your VS code.
How to Setup VS Code
We have already downloaded Salesforce CLI and VS code and installed both tools in our local system. Now we are going to set up our VS code to make it work with our Salesforce Org. So, once you install this extension pack, you can create a new SFDX project here. For that, you need to open the command palette in VS code, and you can do that by clicking on this gear icon here and click on command palette.
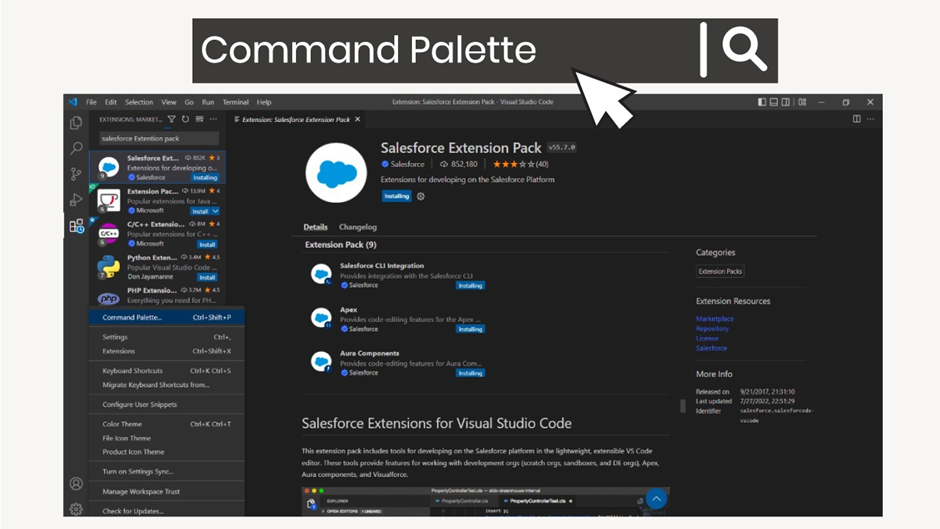
Here in this command palette, you need to search for SFDX: Create Project. You can just type in create project here and you would see SFDX create project command on the top.
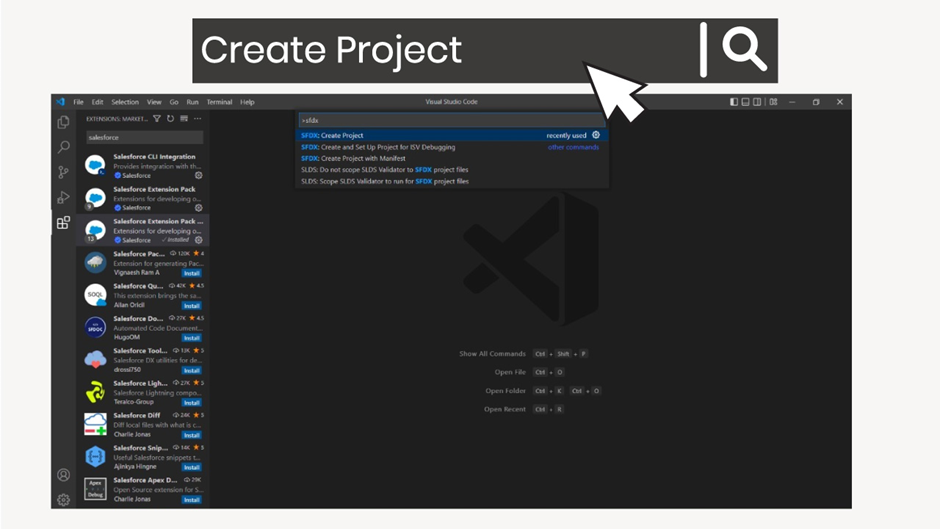
So, click on this command, and now this is going to ask you for some options. For now, we are going to create our project using standard template. So, just select the first one. Let’s name our project as MyFirstProject,
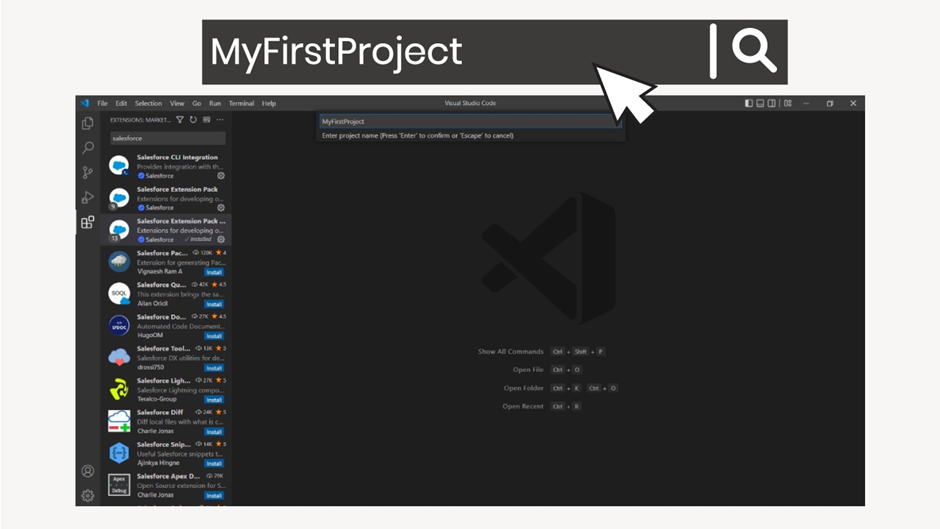
and then you need to select the location where you want to store your SFDX project,.
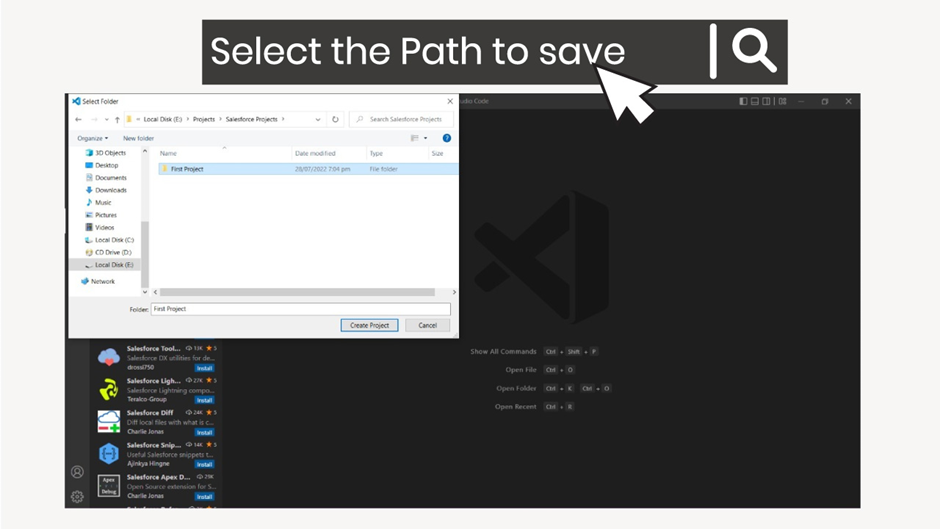
I’m going to save it E:\Projects\Salesforce Projects\First Project, so I will select that, and I am going to click on create project. It will take some time, maybe like a couple of seconds or so, and then it’s going to create a blank SFDX project for you.
Let me close this notification and now if you will go to your file browser, you would see that MyFirstProject has been created by Salesforce CLI.
Whenever you run these commands from command palette here in VS code, like SFDX create project, the VS code runs some Salesforce CLI commands in backend.
That’s why installing Salesforce CLI is very important, before you install VS code and start your Salesforce development, if you don’t have Salesforce CLI installed, then these commands will not work. So, make sure you install Salesforce CLI and VS code both.
And now we’ve got a blank SFDX project with us and we are going to develop our application here .in our local system and then we are going to deploy our changes back to our Salesforce Org. In order to deploy our changes to Salesforce org or take some metadata from the Salesforce org to our local system, first we need to authorize our Salesforce org in the VS code, so that the VS code can access the data or metadata in our Salesforce Org. For that, let’s open the command palette again, so you can go to this gear icon and click on Command palette here, or you could also use command Ctrl + Shift +P as a shortcut to open the command palette.
Now this time, we are going to run the authorize Salesforce Org command. So, we are going to select this Authorize an Org,

and here it’s going to ask you about, like which Org do you want to authorize? Is it a sandbox or is it a production?
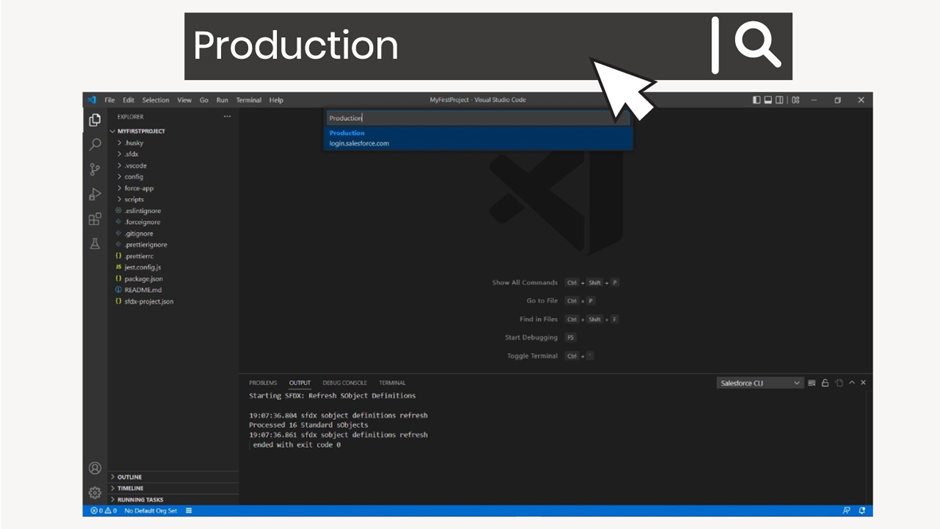
So here, since we are working with a develop edition Org, we need to send the production one, Now, we need to name our Salesforce Org, this name can be anything that you want to choose but try to give it a meaningful name.
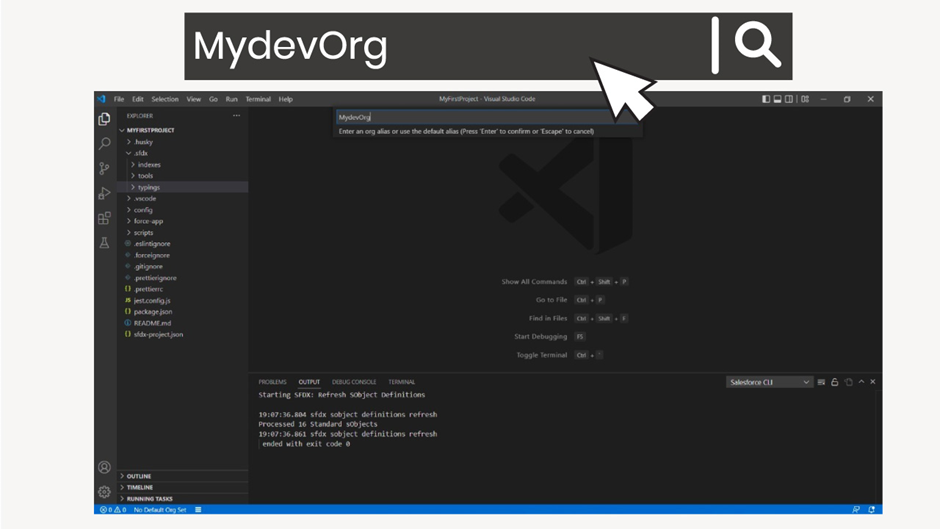
I’m going to name it MyDevOrg, and that’s it. Now it’s going to open a new tab in your browser where you need to supply your credentials.
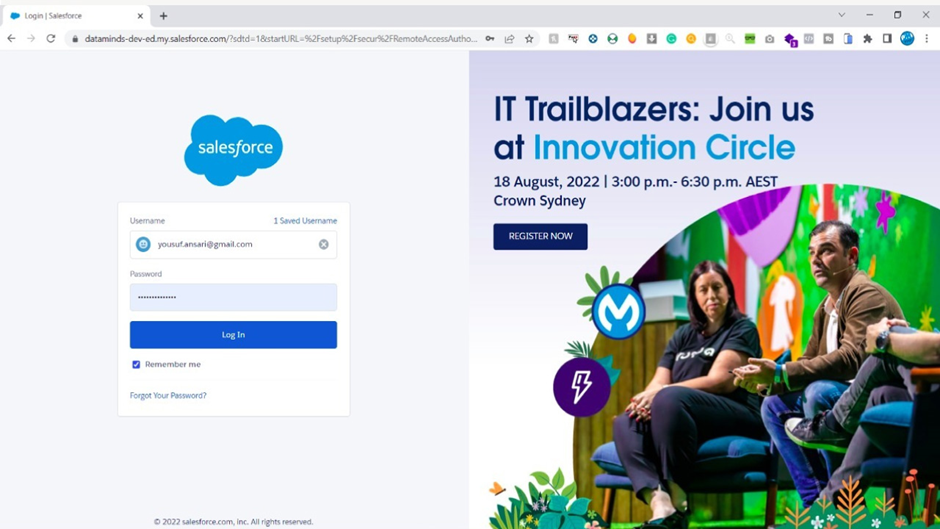
Make sure that you supply the credentials for your developer Org here and click on login button. Once you click on this login button, you may see a prompt about asking your permission to give VS code access to your Salesforce Org.
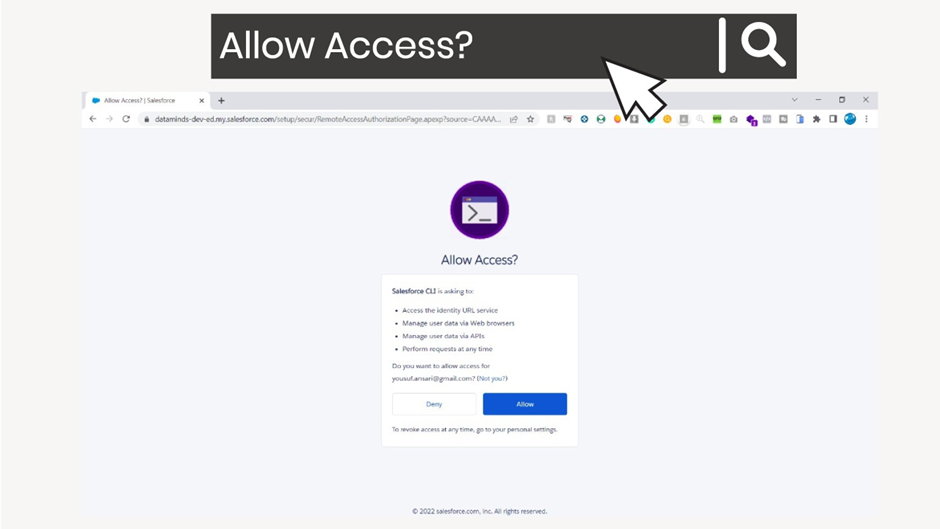
So, just click on allow button there and then it will take you to this page.
Now, let’s go back to the VS code, and here you will see a message that authorizing a Salesforce org is successfully completed.
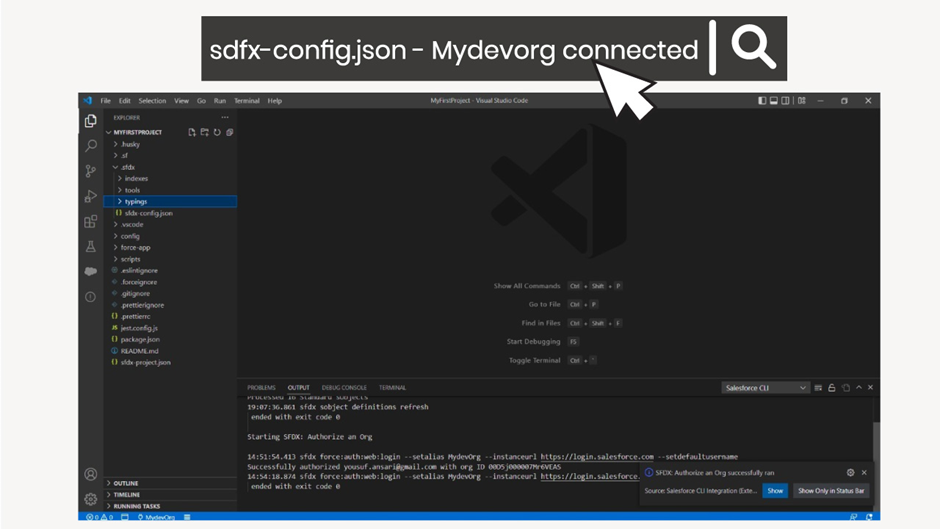
And here you will also see our Org name within the local SFDX project. So, expand this .SFDX folder and open this SFDX-config.json file and you will see that our default username is ApexDevOrg, which is the alias that I have just given.
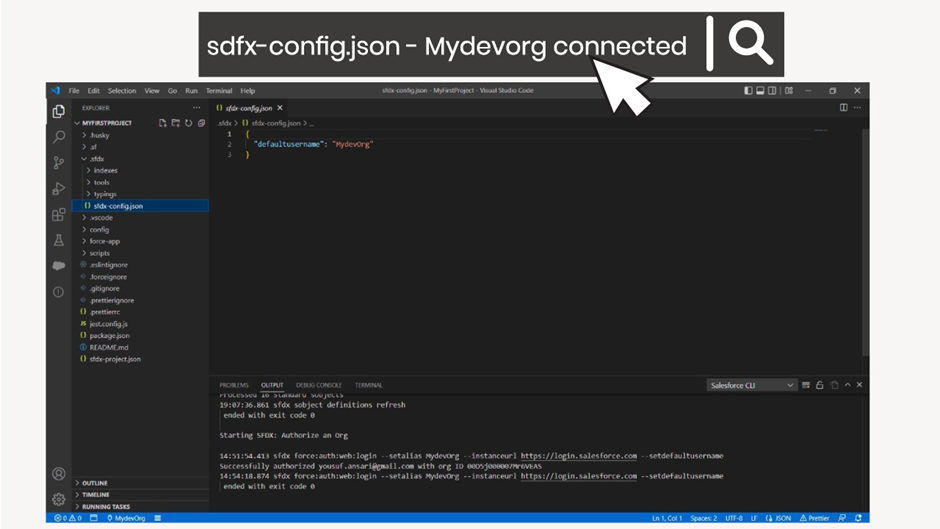
So, now our VS code is connected to our Salesforce Org and we can start developing our application here in our local system and then we can deploy those changes to our Salesforce Org.
How to Work in VS Code with Salesforce Metadata
We have already created a local SFDX project named as MyFirstProject, and then we connected our local SFDX project with our Salesforce Org, so that we can deploy our metadata or get the metadata from the Salesforce Org to our Local SFDX project.
First, we are going to bring our Apex classes from the Salesforce Org to our local SFDX project, because our newly created SFDX project is completely empty, and it doesn’t have any Apex classes or any sort of metadata.
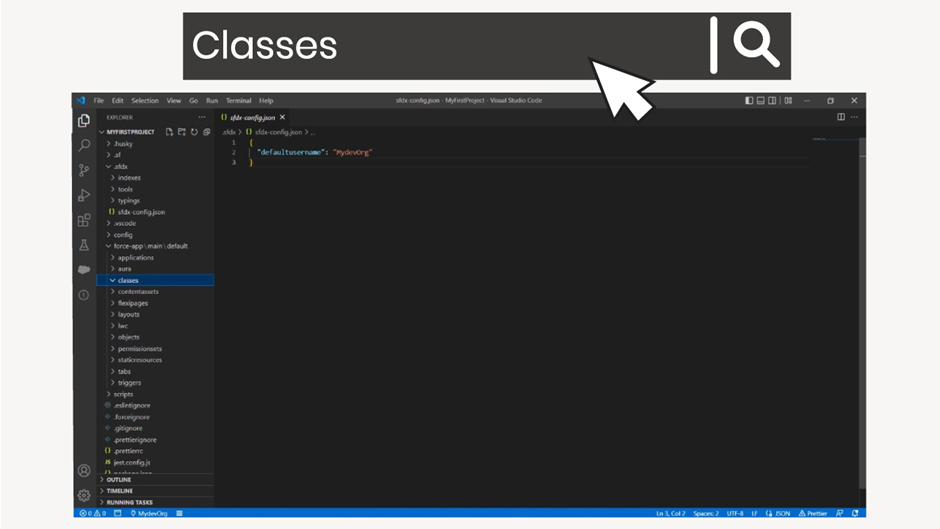
You can confirm that by clicking on this file explorer and then expand the force-app folder and here expand the classes folder, so we don’t see any Apex classes in our local SFDX project. So, we are going to bring the Apex classes that we have created so far to our local SFDX project. The easiest way to do it is to use the Org browser here. So, just click on this cloud icon here that
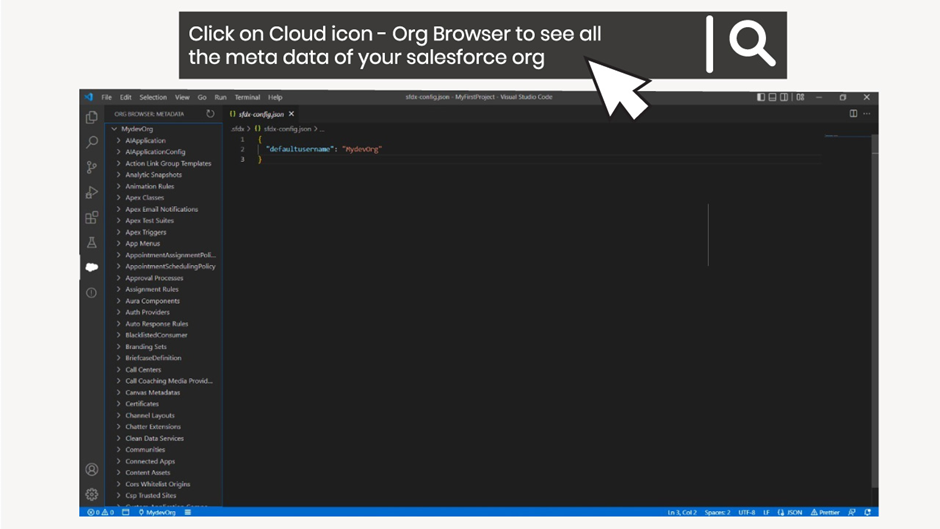
you will see on this left hand side panel and here you can see all the metadata of your Salesforce Org and this is going to show the metadata from your current Salesforce Org that you have just authorized and here, if you will expand the Apex classes, it’s going to show all the Apex classes that are there in your Salesforce Org.
And if you want to bring these Apex classes to your local SFDX project, you can simply click on this retrieve source from Org button or this download button.
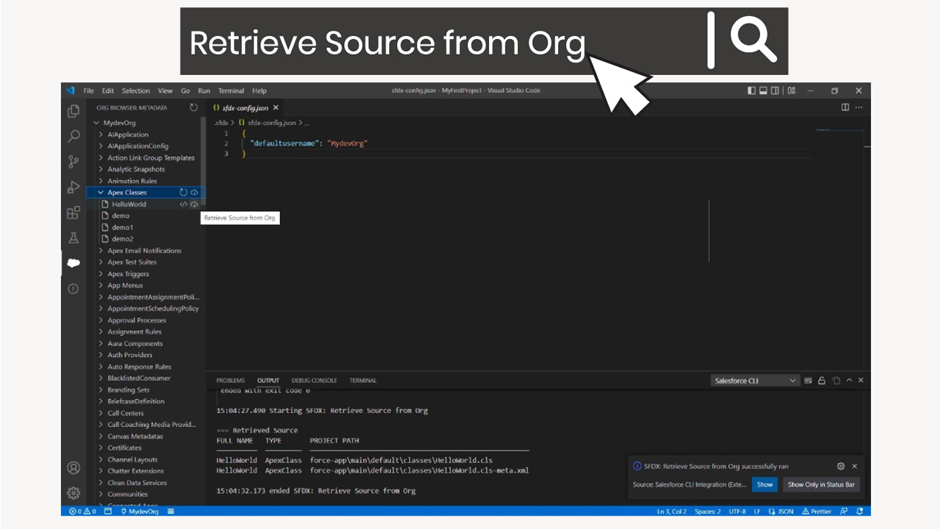
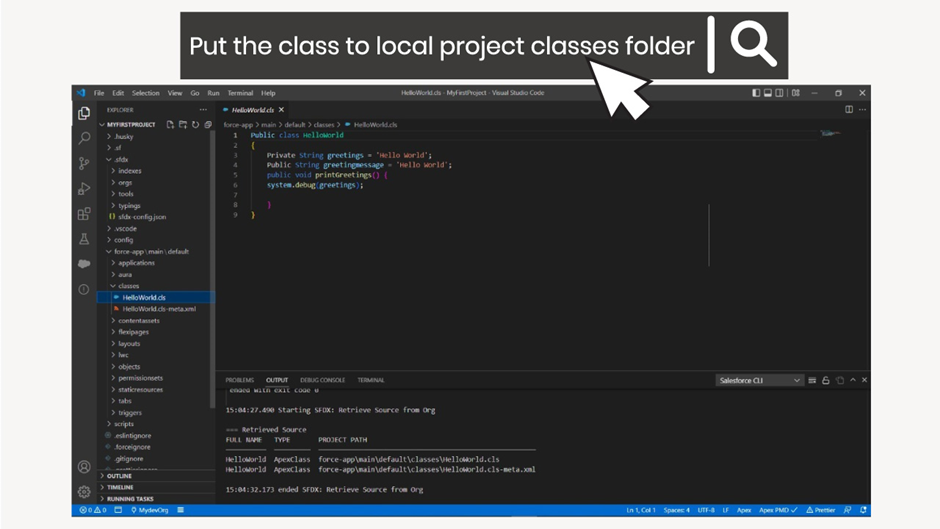
For example, if you want to bring this Helloworld class to my local project, you will simply click on this button and now it’s going to retrieve that class from your Salesforce Org and then it’s going to put that class in your classes folder here.
So, now we can see our Helloworld class right here.
So, this was the easiest way to retrieve the metadata from your Salesforce Org to your local SFDX project, and you can also run these commands in bulk.
For example, if you want to bring all the Apex classes to your local SFDX project, you can click on this download button, which is beside the Apex classes folder, and now this is going to bring all the Apex classes to your local SFDX project.
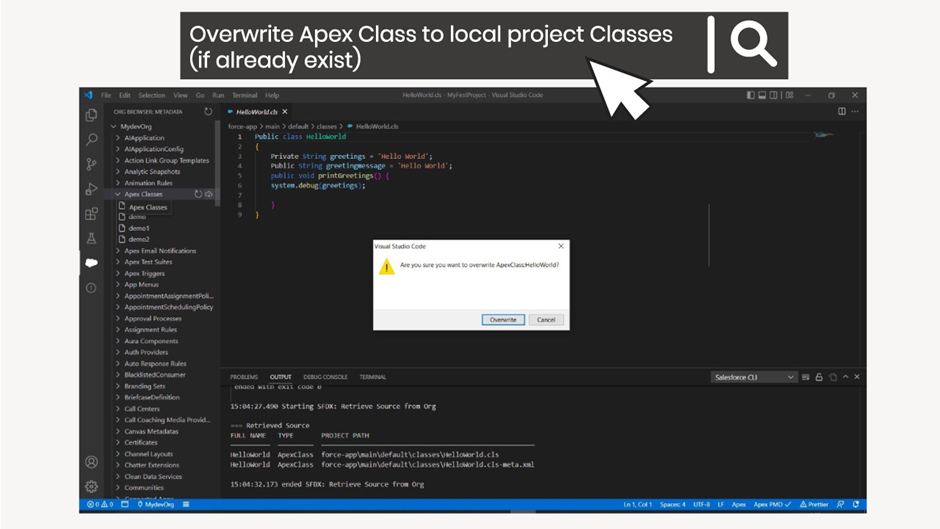
If some of these classes already exist in your local project, then you would see an overwrite pop up here, since we already have the account controller in our local project, we can either overwrite or cancel it. For now, let’s overwrite it, and now this is going to overwrite our account control class and going to bring all the other classes as well. Let’s wait for this command to finish.
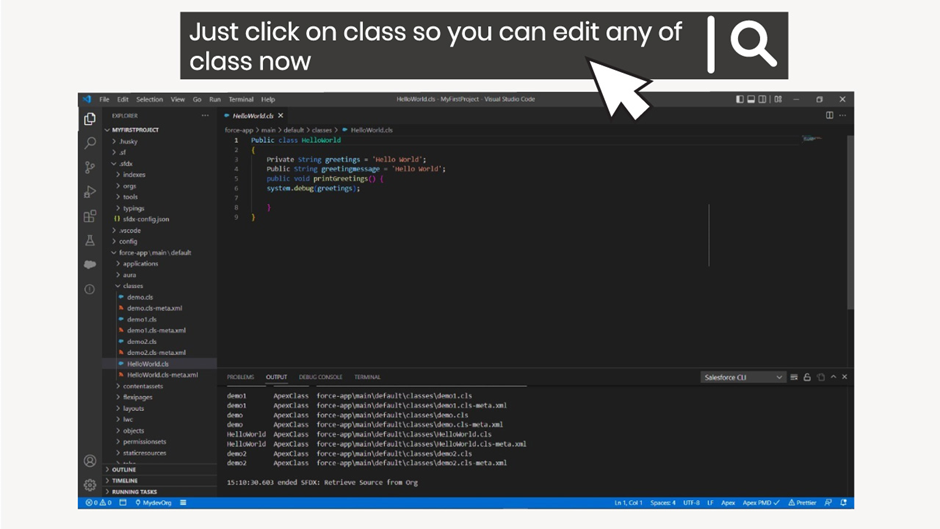
And now we see all our classes from the Salesforce Org to our local project, and we can edit any of these classes now, so the next step would be to make some changes in these classes locally and then we are going to deploy these changes back to our Salesforce Org.
If you remember how it used to work in developer console, we simply used to create our classes here and then we used to save those classes and these changes would be saved directly to our Salesforce Org, but this is not the case when you work with VS code. When you make these changes, first these changes apply locally, and then you need to manually push or deploy these changes to your Salesforce Org.
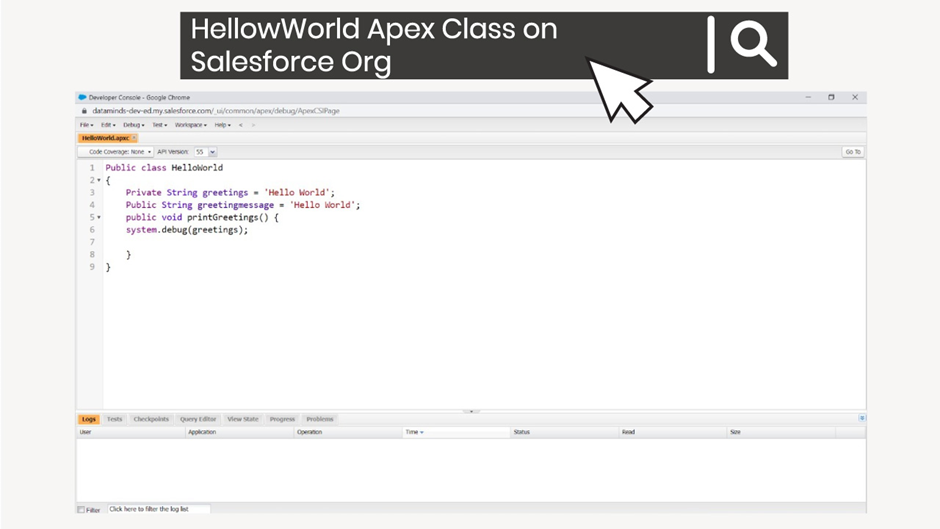
For example, I’m going to make some changes in our Helloworld class. Let me open the Helloworld class here. I’m going to close this, so that we get some space here, and let me create one more variable here. I’m going to name it Endmessage,
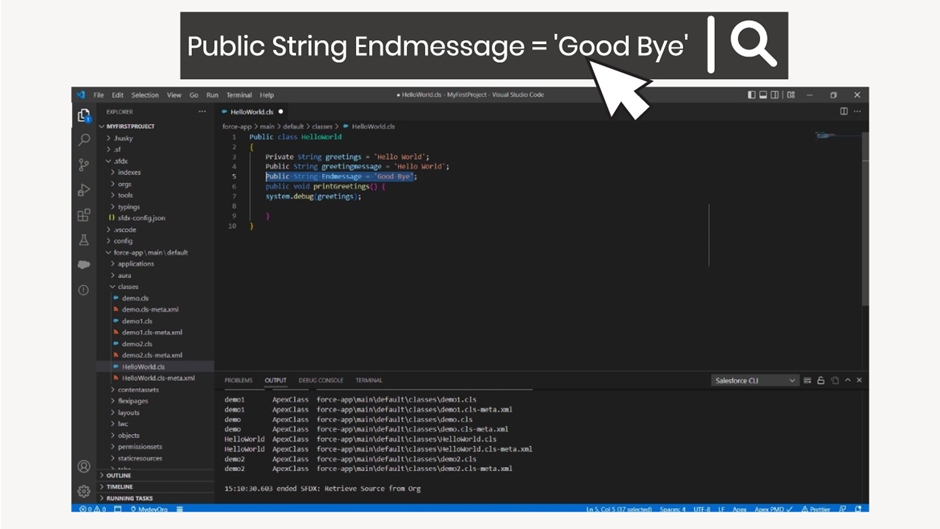
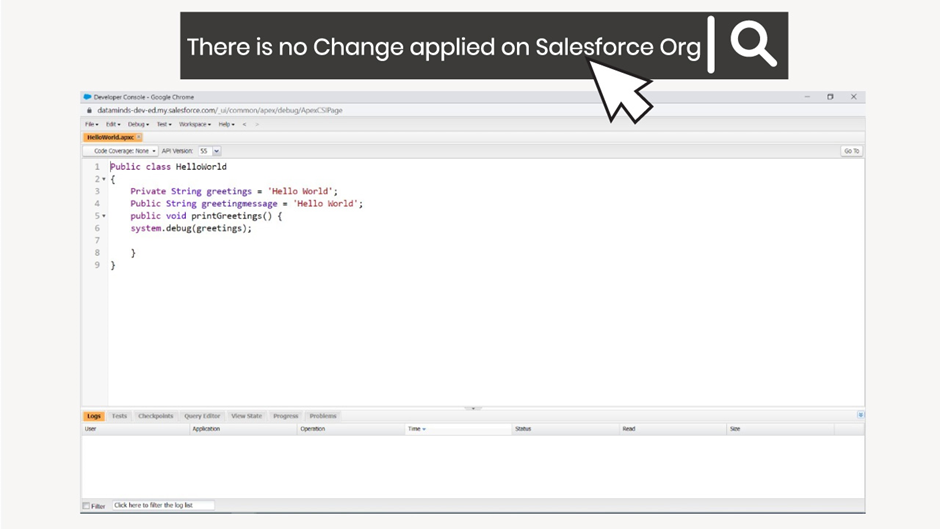
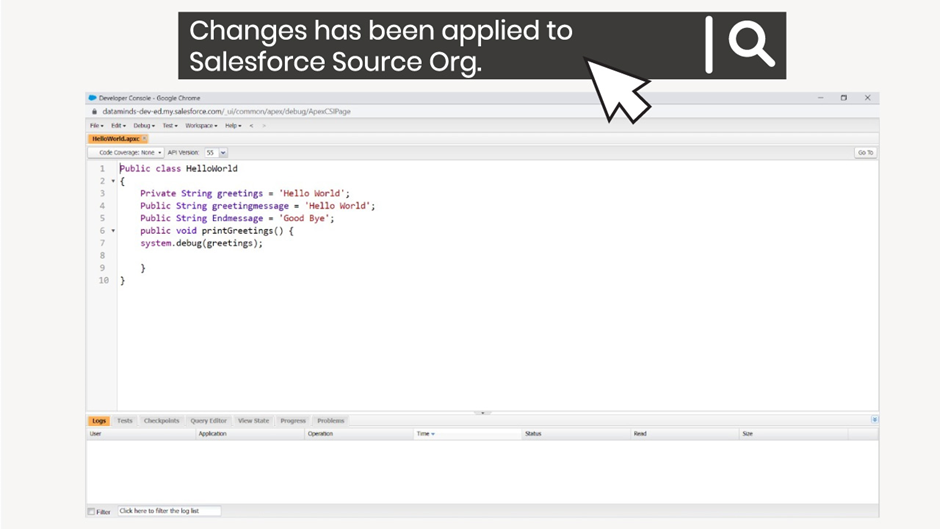
and let’s simply write some text here. This is a change that we have just made, and we have saved our class, but do you think this change has been pushed to our Salesforce Org as well? So, let’s confirm that. Let’s go back to our developer console and open our hello world class here. Click on Open and we don’t see our new variable Endmessage here because that change that we have just made, it stays locally. It’s not there in our Salesforce Org yet.
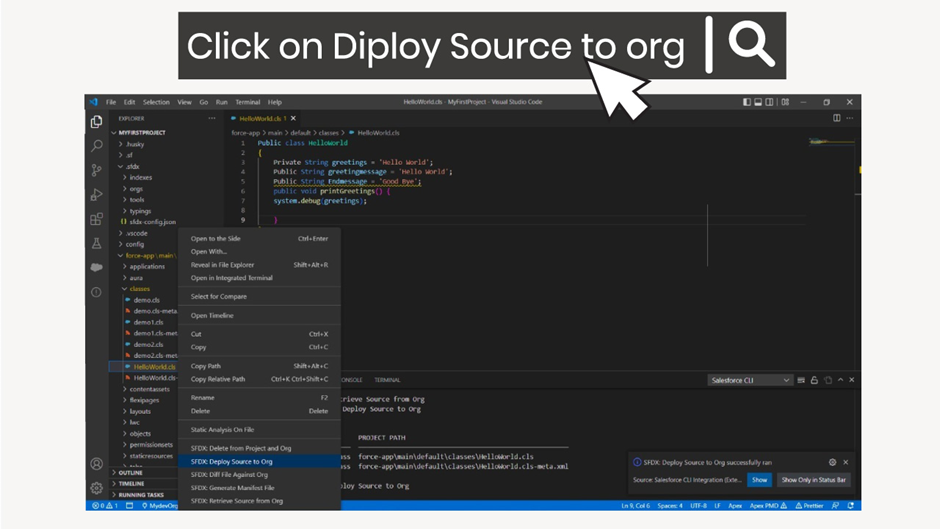
In order to push this change to our Salesforce Org, either you can Right click on this file and click on this option called deploy this source to Org, and this way, we would be able to push our changes to the Salesforce Org, or you can also right click here and click on Deploy Source to Org.

The other ways would be to run a command called deploy this source to Org from the command palette as well.
Now if you go to our developer console and refresh this page and open our helloworld class, we will see our new variable Endmessage, because now we have deployed our changes to the Salesforce Org.
So, this is how it works. This is how you can make changes to locally and then you can push these changes to your Salesforce Org.
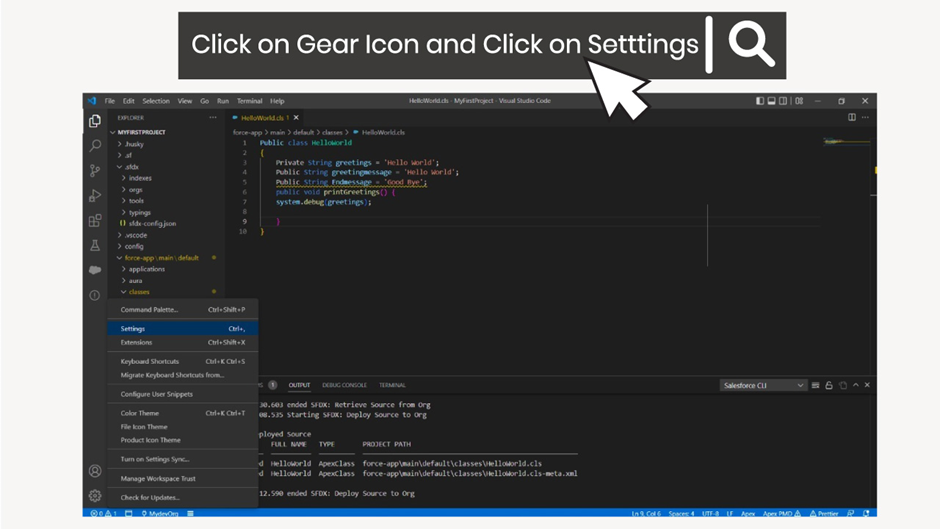
If you want to auto deploy these changes to your Salesforce Org, you can enable a setting called auto save these files or auto deploy these files when you save them locally. So, click on this gear icon to enable that setting, and here, click on the setting option
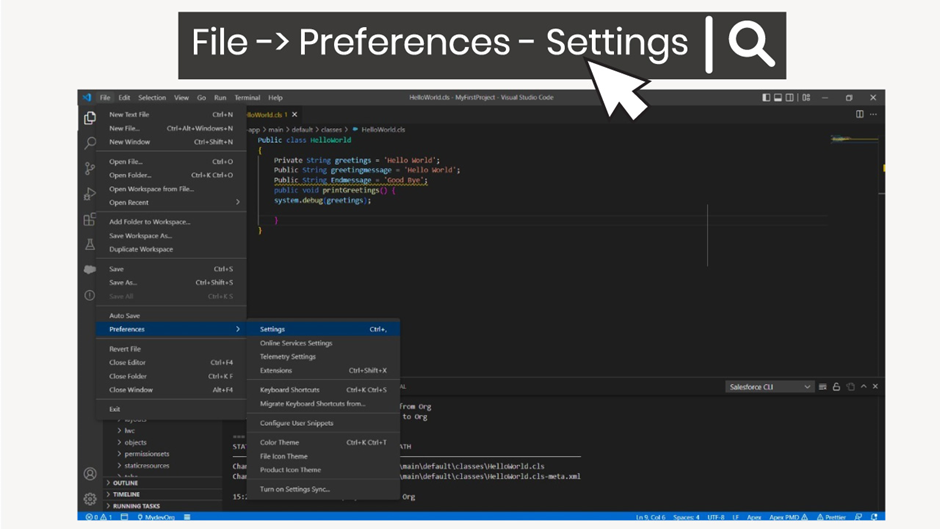
or you can also open the settings from the preferences and setting here,
and here, search for a setting called deploy on save and you will see the setting from Salesforcedx extension,
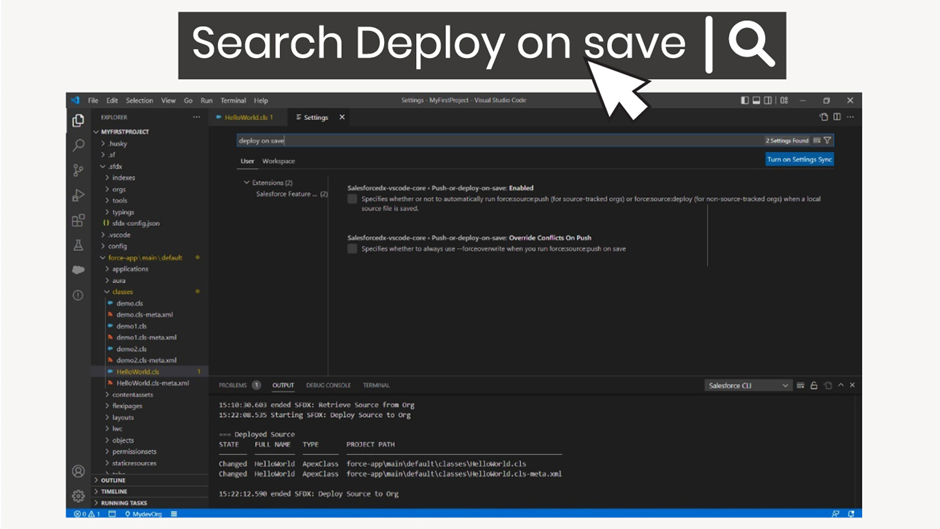
and this is the extension that we have downloaded before and you can simply enable this setting.
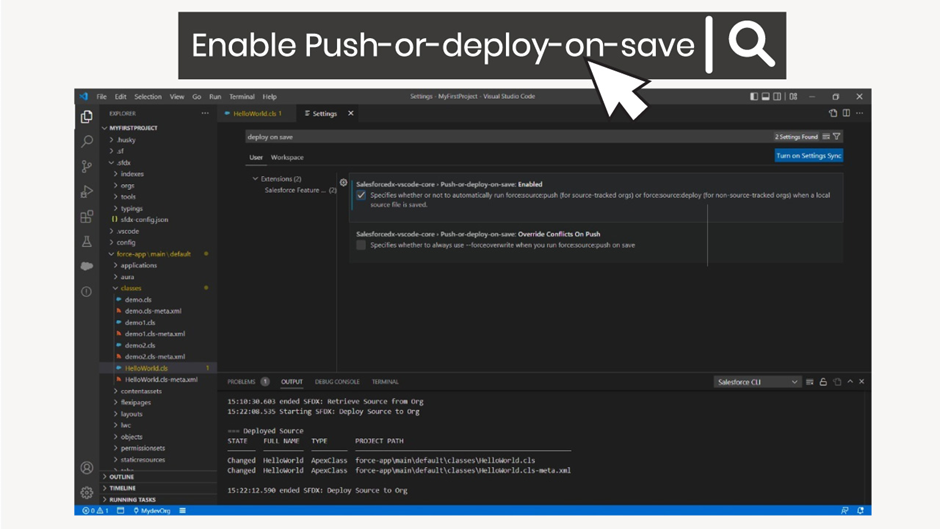
So, once you enable this setting, whenever you are going to make a change, for example, let me make some change here. Let me also add autosave here. And when you’ll save this file here, it will be auto deployed to your Salesforce Org. So now you see, the VS code is automatically deploying the source to our Salesforce Org.
I am, personally, not a big fan of this feature, so, I’m going to uncheck this option because I want to deploy my changes altogether when I’m done with my local development and this is recommended way. One more difference that you will observe between the VS code and the developer console is, in the developer console, you could see your errors in the code directly here while you are typing your code,
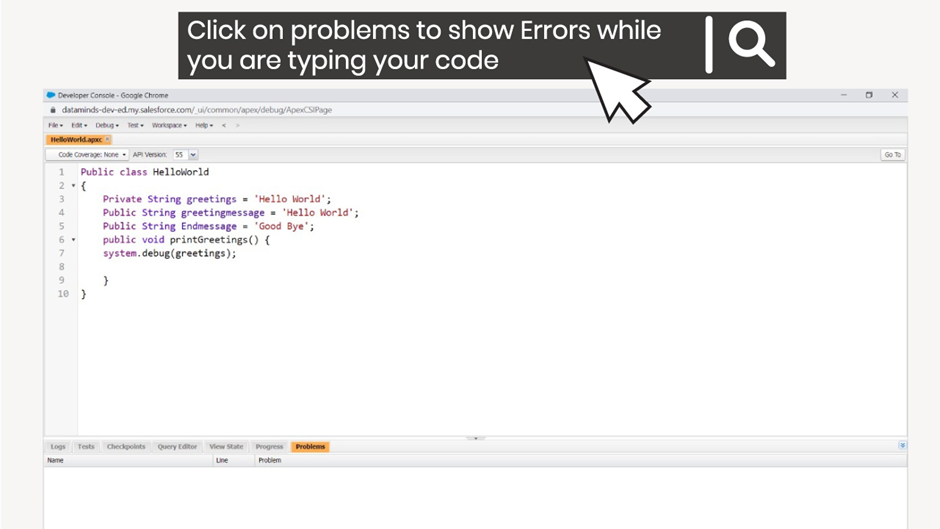
However, in case of VS code, when you will push these changes to the Salesforce Org, then only you can see the error.
So, let’s say if your code has some errors. So, you won’t see them directly here while you are typing your code or while you are saving your code, you will notice your error when you’ll try to deploy these changes to your Salesforce Org.
Because that’s only when the Salesforce compile your code and going to look for the problems. So, this would be one more difference between the developer console and the VS code, but VS code is more powerful tool than the developer console as it comes with auto completion of your code, and it’s easier to search through your complete code base.
For example, if you want to find some reference, you can simply use the global file search here and you can simply look for your references or you can perform a search here. So, it’s sort of an integrated development environment for your Salesforce Org, and you can manage your complete development from one place.